Navigation menus
You can view and change your online store navigation from the Navigation page in your Shopify admin.
Learn how to set up your navigation menus
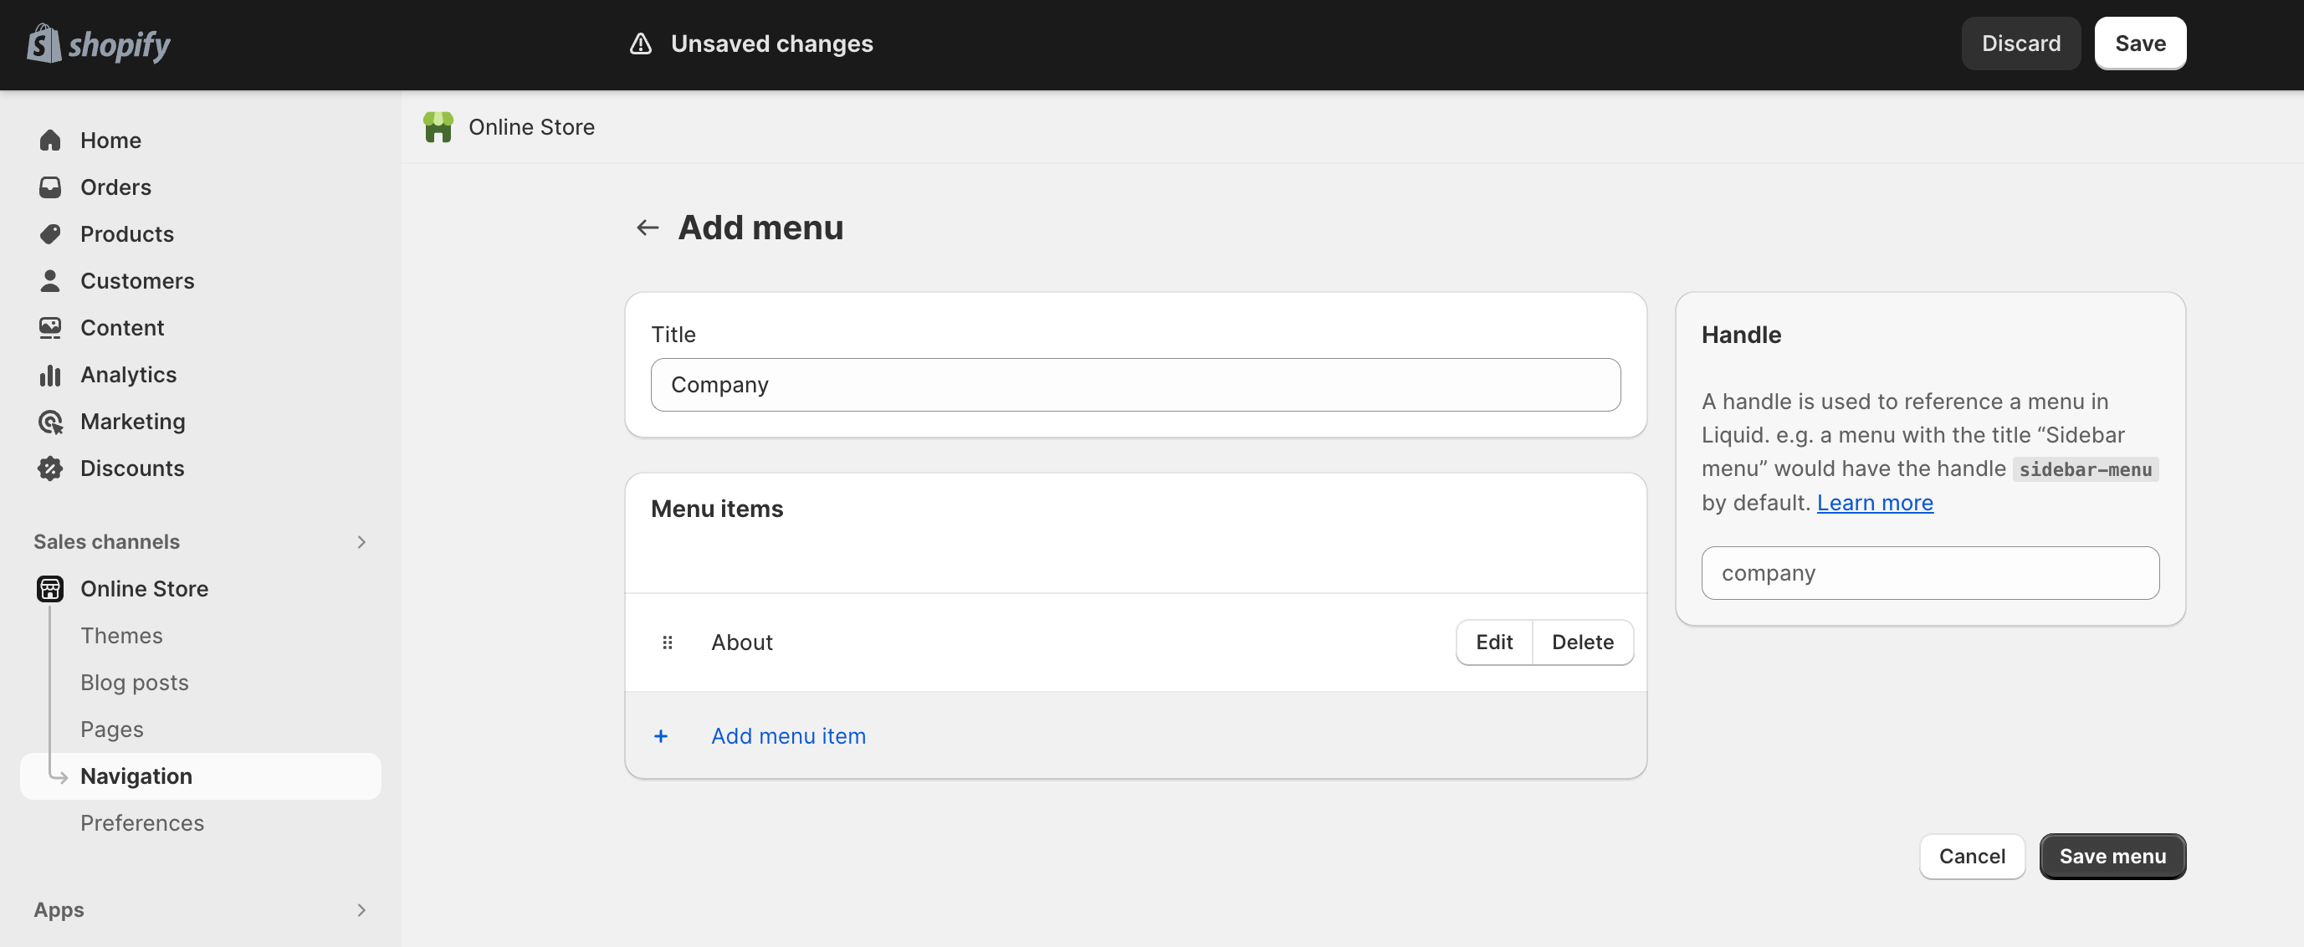
I. Add a menu
From your Shopify admin, go to Online Store > Navigation.
On the Navigation page, click on the Add menu.
Enter a Title for the Menu.
Select + Add menu item > Enter a Name for the Menu item.
Click the Link field, and then enter a website address for an external website or select a link type.

Details
Home - your online store's home page
Collections - a specific collection or all collections
Products - a specific product or all products
Pages - a webpage on your online store
Blogs - a blog on your online store
Blog posts - a blog post on your online store
Policies - one of your store policies. To create an email link, use the format “mailto:[email protected]”
Click Add to save your menu item.
Click Save menu.
II. Edit a menu
Steps:
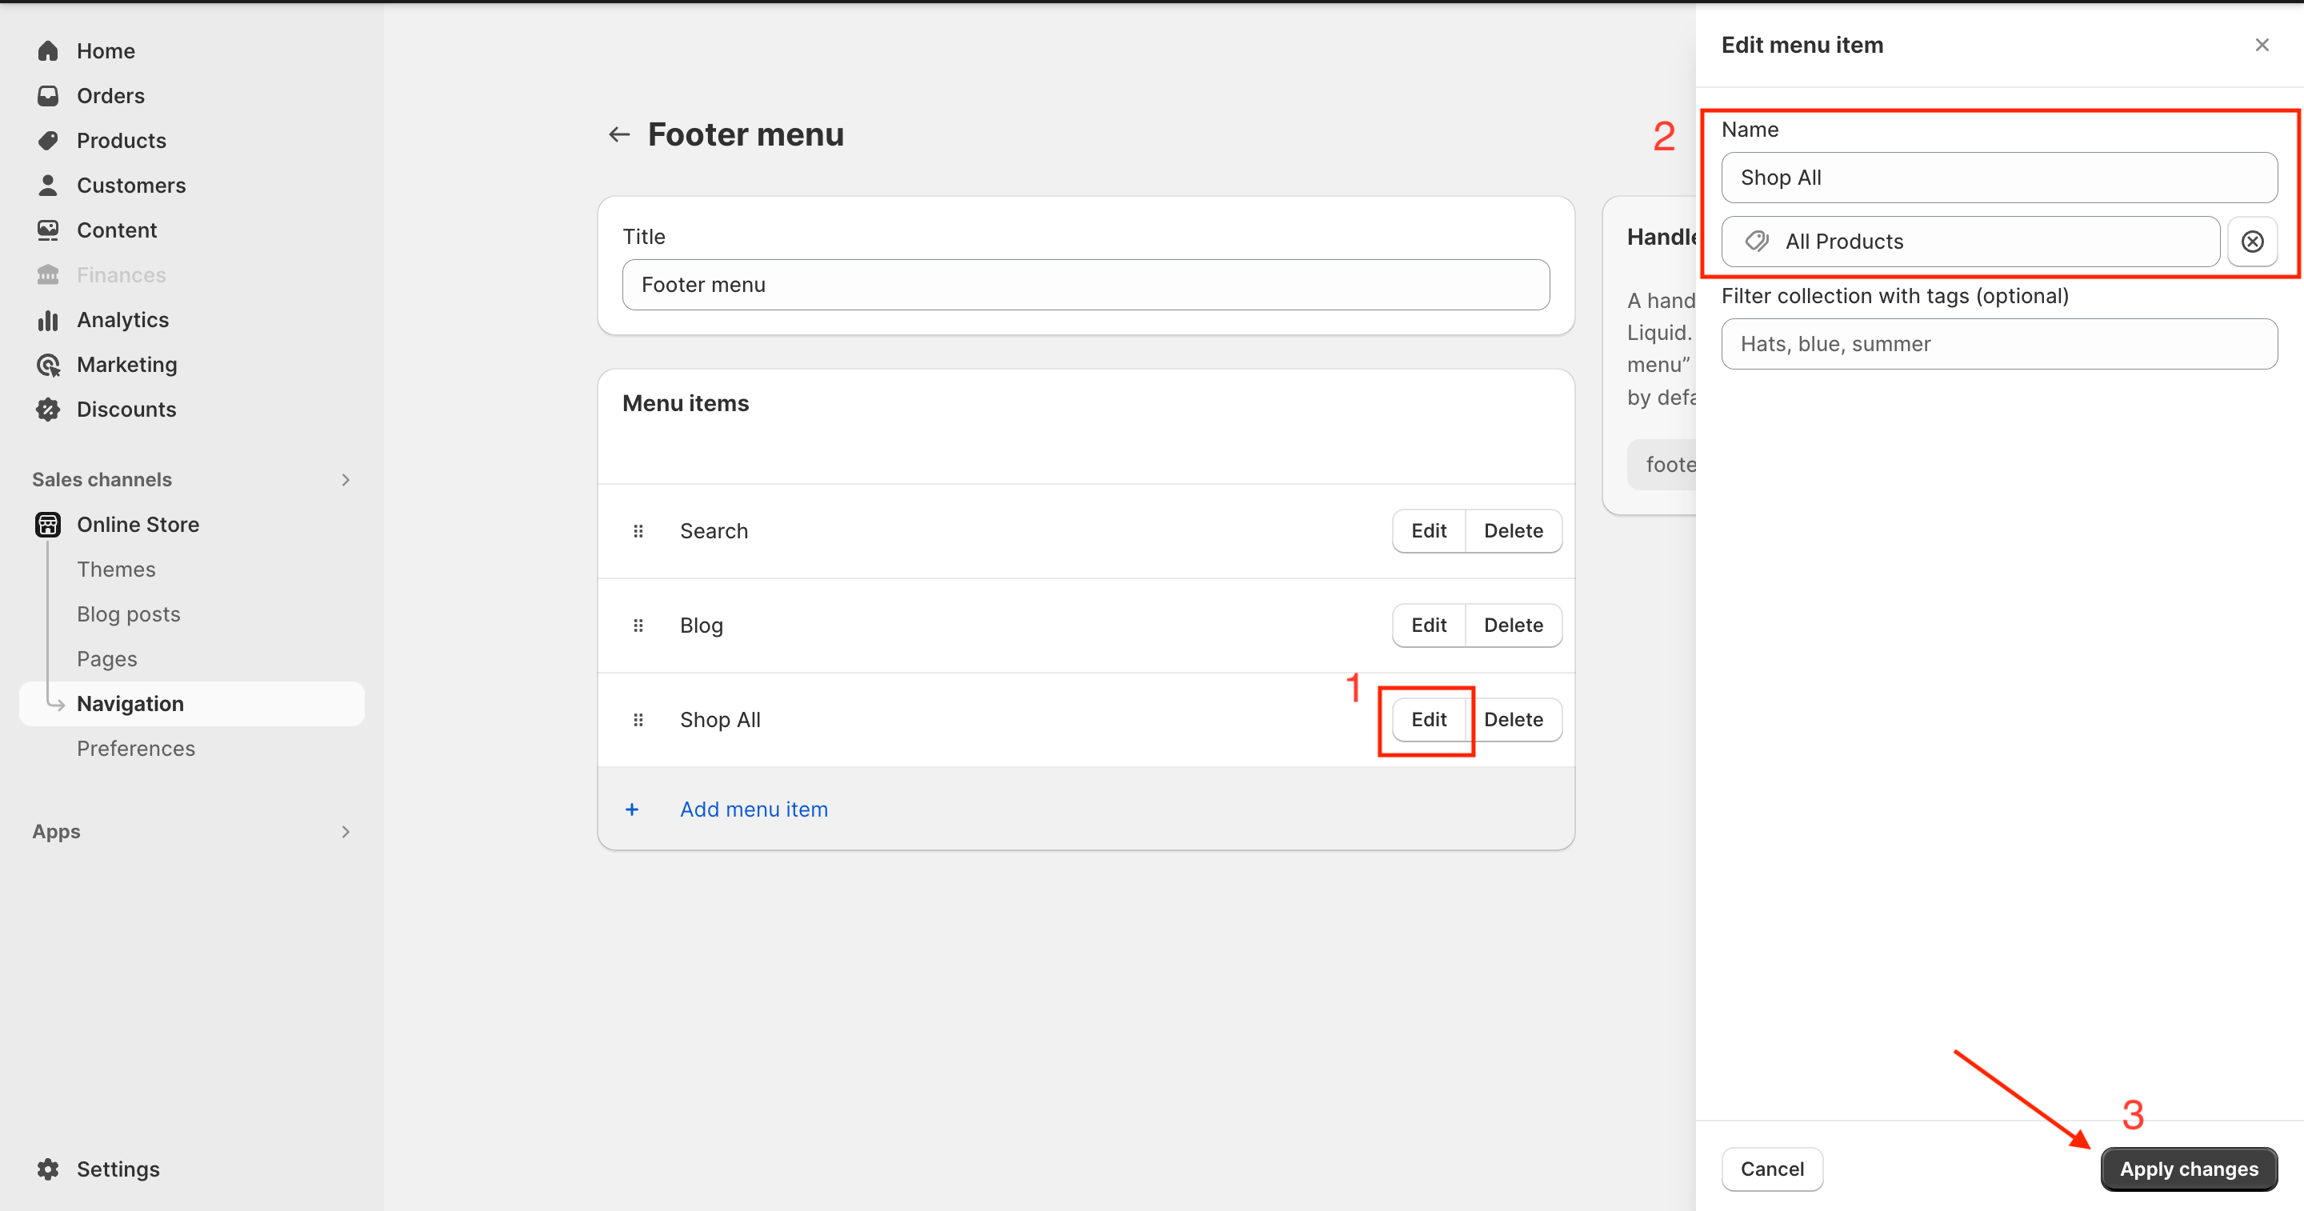
Click the name of the menu.
In the Menu items section, click Edit beside the name of the item.
Make any changes:
To change the name of the menu item, enter text in the Name field.
To change the destination of the menu item, click the ⓧ in the Link field, and then enter or select a new destination.
Click Apply changes.
Click Save menu.
III. Change the display order of menu items
Steps:
Click the title of the menu that you want to reorder.
Click and hold the handle icon (⠿) beside the menu item, and then drag the menu item to another position
Click Save menu.
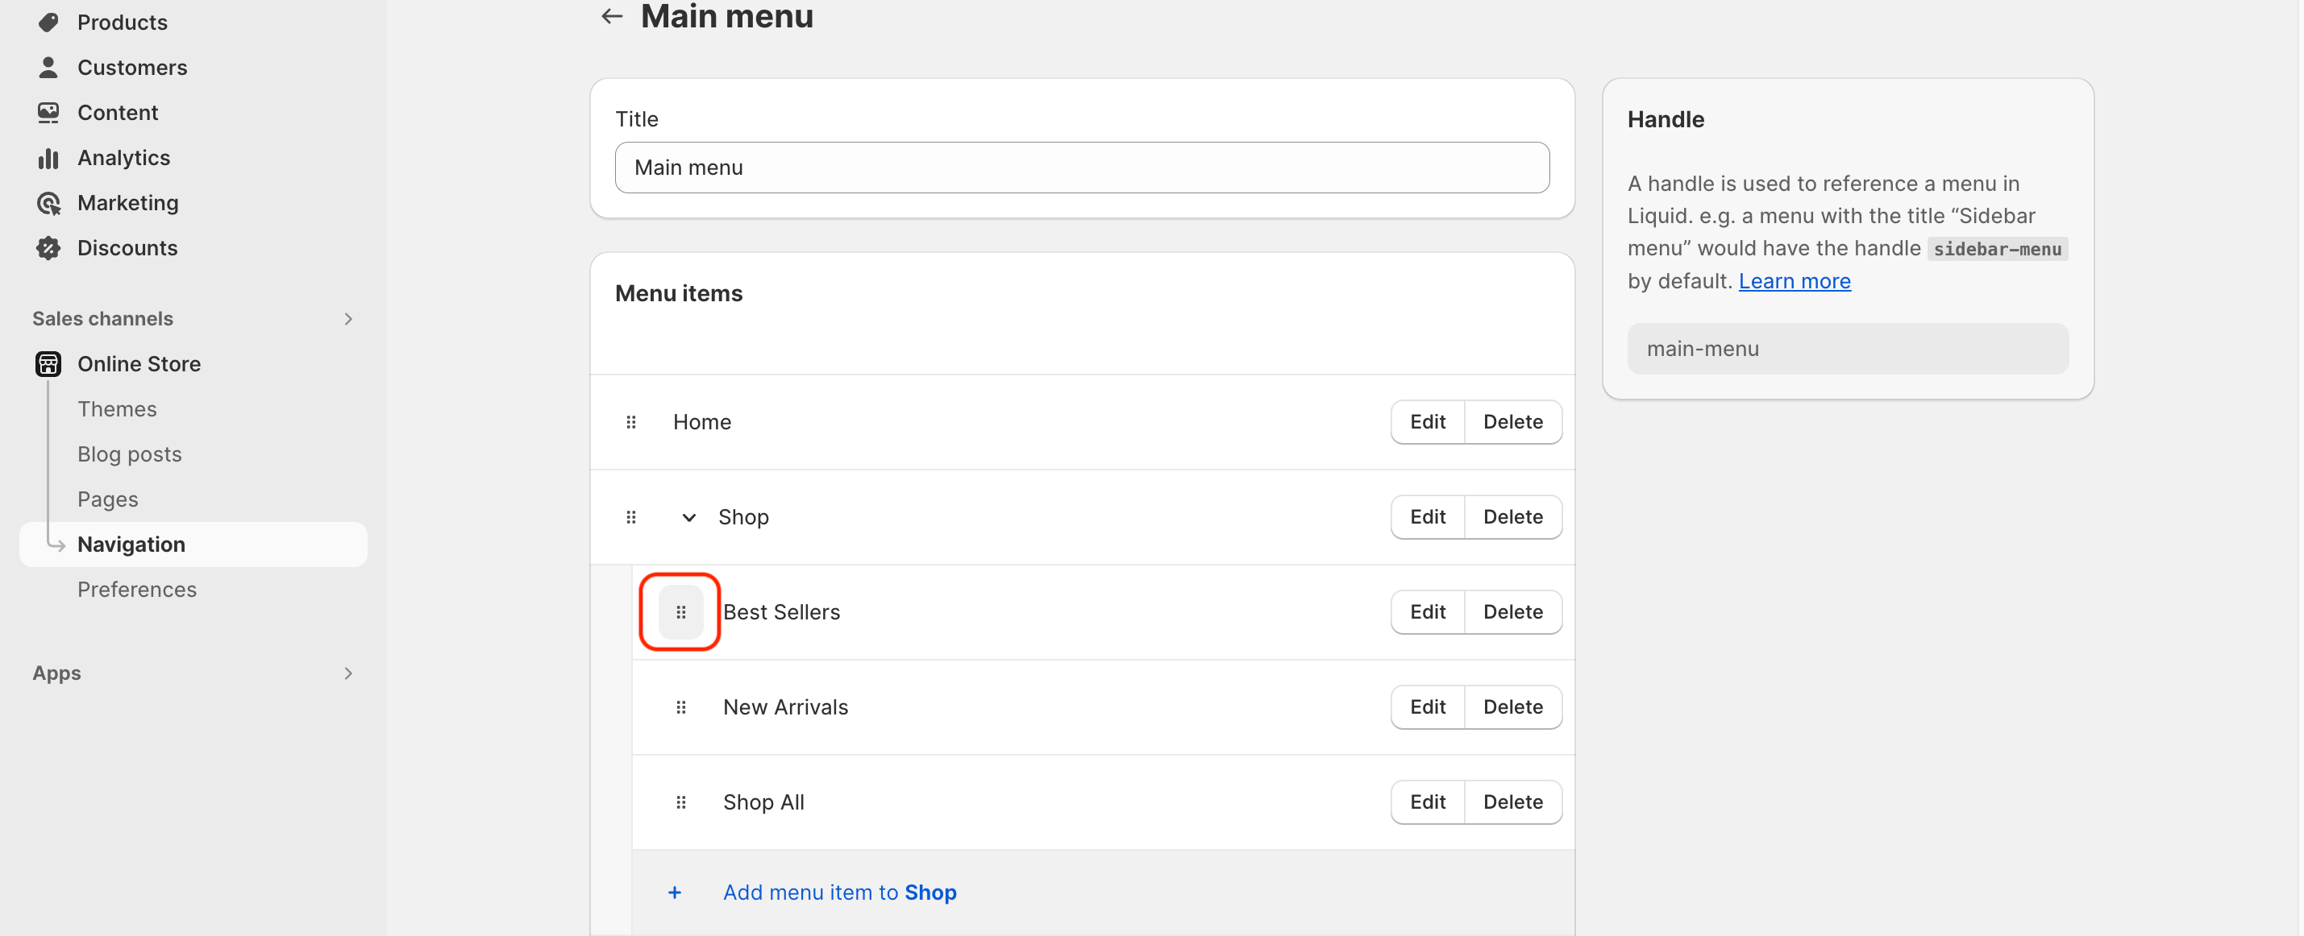
Note: Efficient and intuitive navigation is crucial for allowing your customers to explore your products or services effortlessly. Utilize options like dropdown menus, or mega-menus to organize your store’s categories and subcategories logically.

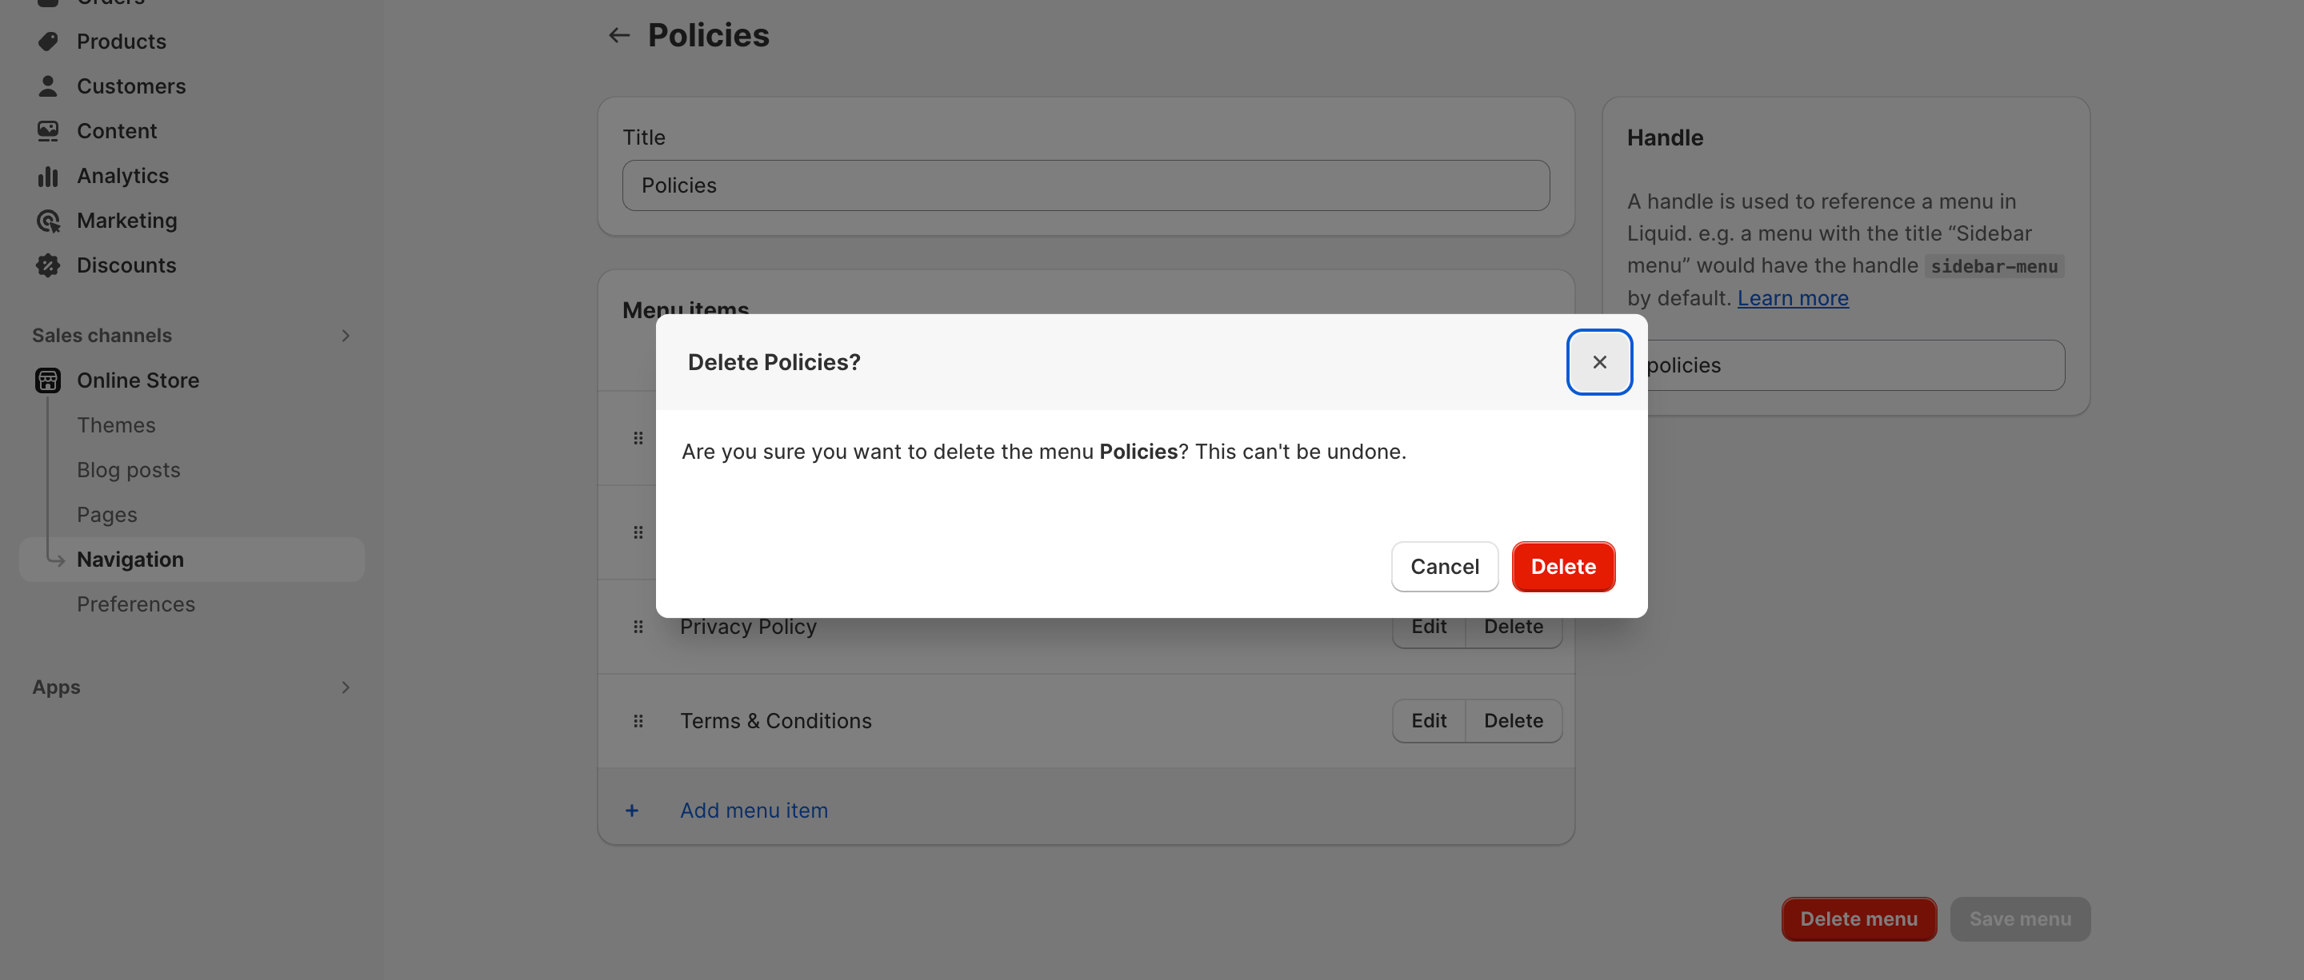
IV. Remove a menu
Steps:
From your Shopify admin, go to Online Store > Navigation.
Click Delete menu beside the menu item that you want to remove.
Click Delete to confirm.
V. Link your menu to the header and footer
Link to the Header
Steps:
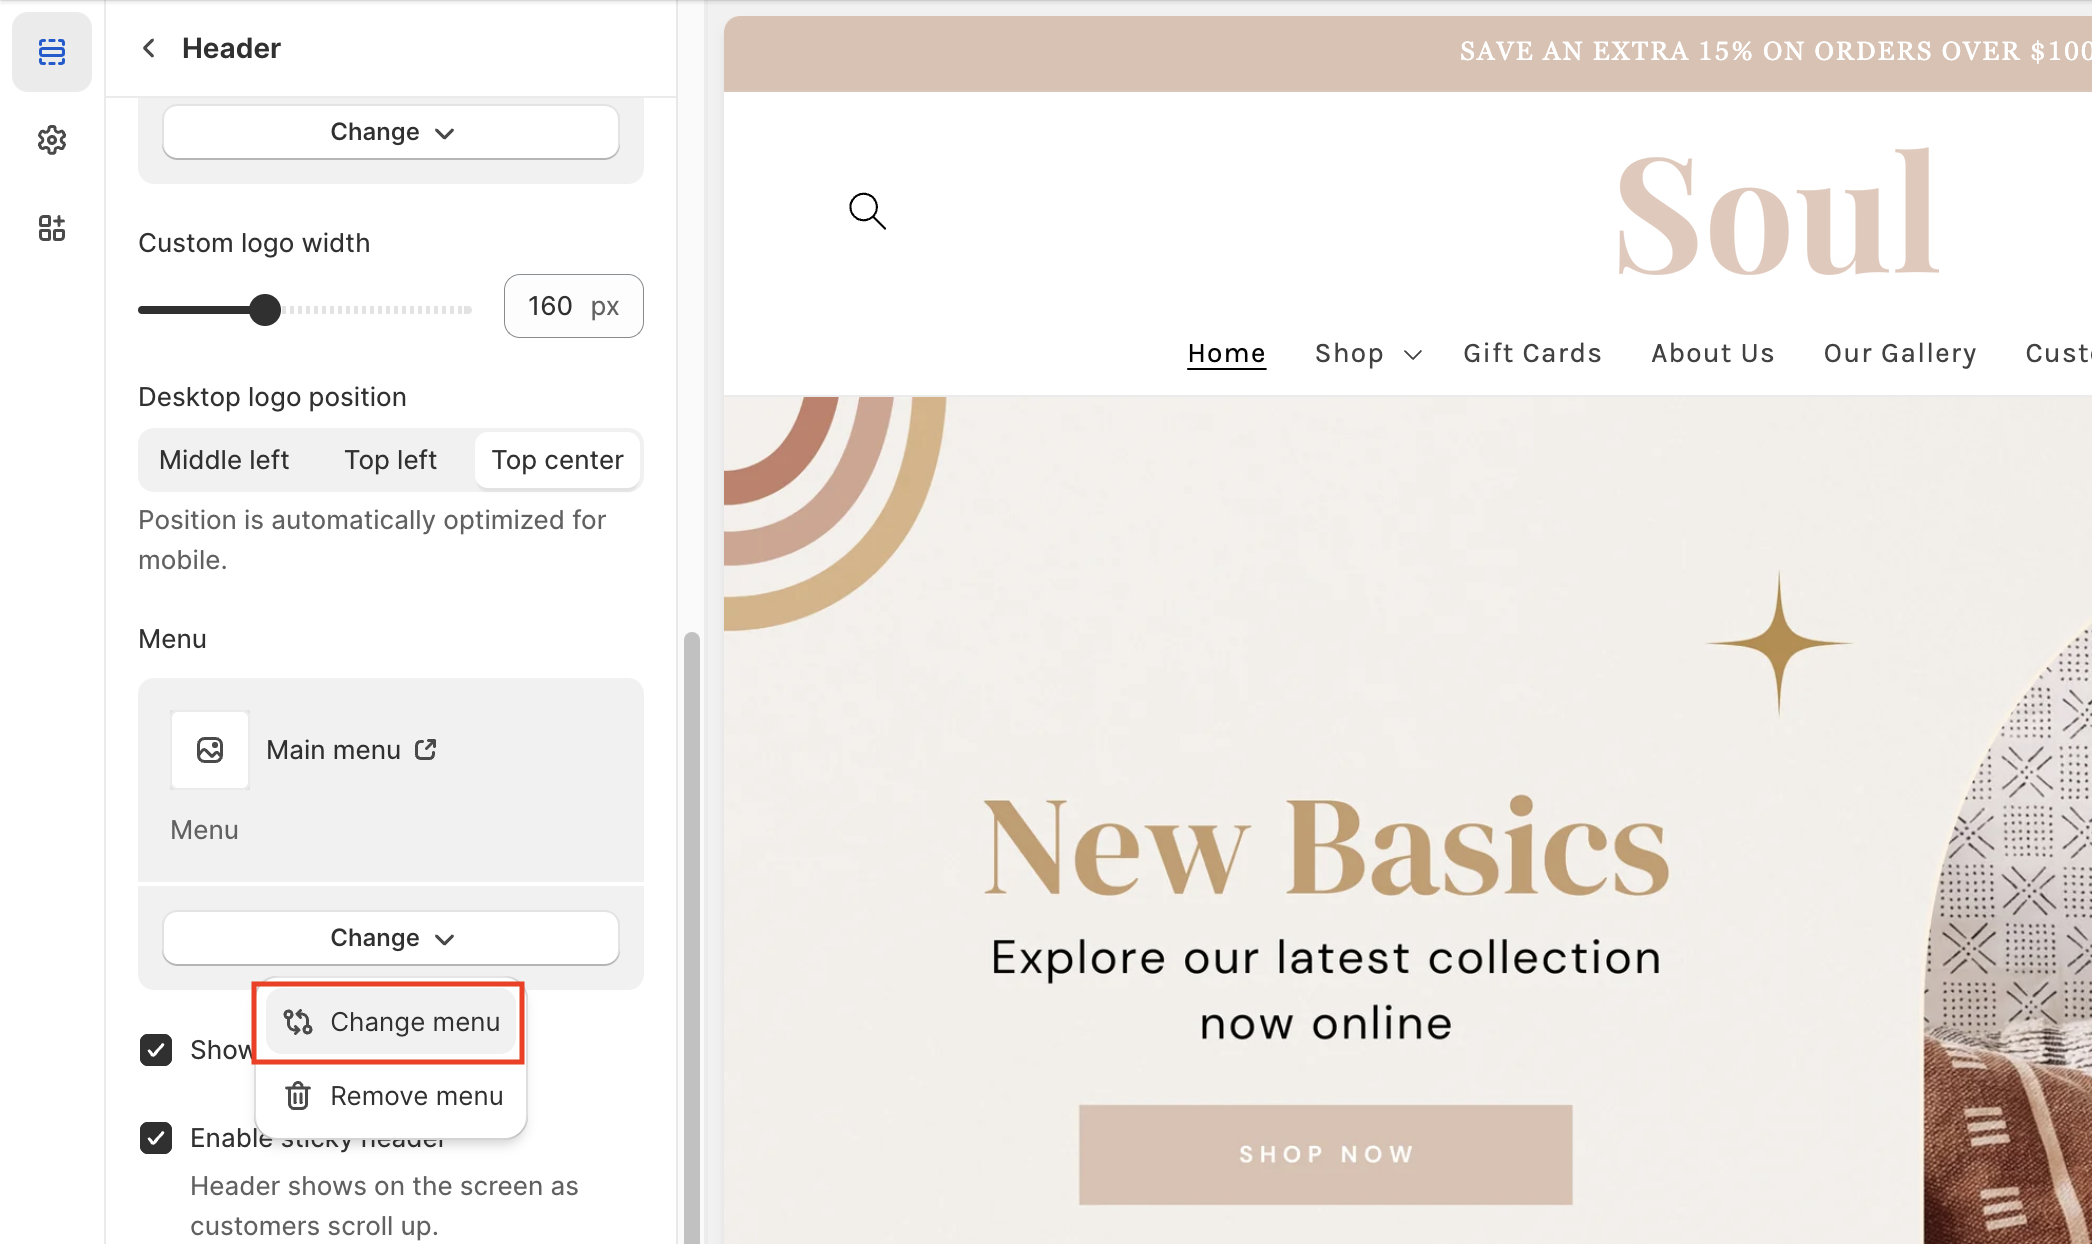
Select Header on the left sidebar to start editing the section.
On the right sidebar, look for the “Menu” section. Select Change > Change menu.
Select the menu you created earlier.
Click Save.
Link to the Footer
Steps:
To add a block, hit the “Add block” button on the left sidebar in the Theme editor and select the Menu block type.
A new block will be added and named Quick links by default.
Change the block's name and pick the menu you have prepared.
Click Save.

Last updated
Was this helpful?